An Ackstar Is Born
The Story of the “Blood Dragon” in WarBirds
Many people today refer to the B-17 in gunship mode as an “ack-star.” Which is more or less true - grinding around in circles spewing tracers isn’t all too challenging a feat. But the noble beast has roots, as the reader will soon find …
Welcome to the Machine
“Creative” use of the B-17 (or bombers in general) began back in Air Warrior. The two favorite ships were the F/A-26 “Blood Pig” and the “A/B-17 Blood Dragon.” The ‘Pig was used as follows - swoop in, pop acks, land at enemy field, taxi and park behind take-off spot at enemy field, kill people as they appear. Ho ho.
The ‘Dragon was used more like a conventional AC-47 or AC-130 gunship - put it in a pylon turn over the enemy camp and let the gunners have at it. Occasionally break the pattern to kick a few bombs out at stubborn defenders. And, in fact, the “Dragon” sobriquet came from “Puff the Magic Dragon” as the gunships were known in Viet Nam.
The story of the Blood Dragon’s introduction is written up on this web site on this page.
There are those who say that such use of a bomber isn’t realistic. And “would never happen in real life.” But who in their right mind would think to load up a C-47 with half a dozen machine guns and strafe troops with it - in the missile age - at night? Likewise who would try shoving 40mm AAA guns and 75mm howitzers in the back of a C-130 and doing the same thing? Yet these very things happened. I’m not entirely convinced that such a tactic wouldn’t have worked in WW2. But that’s a point for historical debate - and the Blood Pig and Blood Dragon weren’t about history. They were about pissing people off.
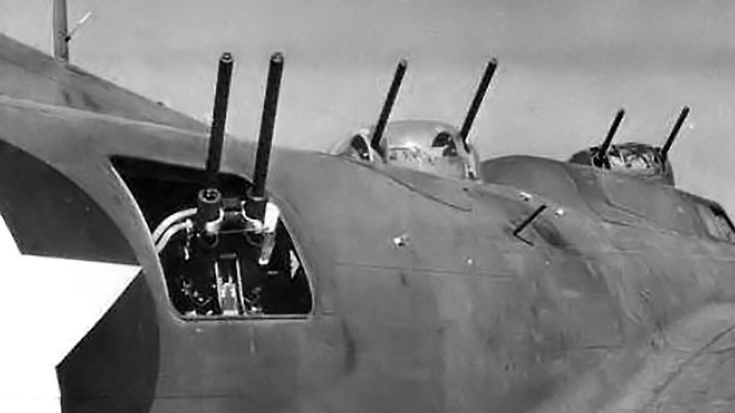
WarBirds introduced the B-17 pretty early on (I think around version 0.92), but they also added the extra bonus of “Otto.” The robo-gunner or auto-gunner (hence “Otto”). So now a B-17 had the full complement of defensive gunnery it needed for … uh … self-protection. Yeah, that’s the ticket.
The DoK Side of the Moon
WarBirds has something else that Air Warrior didn’t - night. And the night time was the right time for the Blood Dragon. Otto had perfect 20-20 night vision, while your Mark I WarBirds Dweeb did not (unless you cranked the brightness on your monitor of course). The only “down side” was that you couldn’t bomb accurately at night. Soooooo …
The preferred tactic was to make a medium-altitude bomb run right at dusk to take out the enemy AAA emplacements. This meant you needed 2 AB-17’s - one for each side of the strip. Once the AAA was down, both ships would curl back in and start the suppression mission. For the few minutes of darkness, the Blood Dragons could totally dominate the airspace - which really pissed people off because there was nothing they could do but wait for the dawn.
And at the first glimmer of the sun, the Blood Dragons would break contact and head for home. This is one of the few times when the AB-17 would try to break for home - usually you assume you’re just going to die. But from first light to the time the enemy fighters felt they were “safe” to come out again was usually enough time for the 17’s to break, off, dive to the deck, and get in close defensive formation. And as much as getting shot up by AB-17’s at night angered people, it really got to them all the more when the intruders were able to get home and land those kills. And getting home wasn’t about landing the kills (no one flies the AB-17 for scoring purposes), it was about getting away clean with the attack.
The AB-17 Envelope
So, what can the AB-17 really do in the air? Just about anything a fighter can do - only slower. It can run down slow flighters (like Zero’s and Wildcats). It can Immelman, barrel-roll, break-turn, yo-yo, and even (for the really brave) split-S. But all these moves are done in slow motion. Which means the pilot must understand what the plane will be doing 5 seconds from now, and what the enemies around him will be doing 10 seconds from now … or “one move ahead.”
The biggest leap of faith is just knowing that the big plane can do all these things without falling apart. Going into an attack dive and having the thing buffetting around and fighting compressability is not something people would generally try to do. Neither is kicking it vertical until it stalls out and doing a slow wing-over. But all these things are possible with practice and are keys to how the Blood Dragon goes out and hunts fighters.
The firing envelope is also different. In a fighter, you’re looking for a 12-to-6 shot. In the Dragon, your best angles are at 45 degrees all around the plane - those provide the most Otto’s with a firing opportunity. So in planning to attack an enemy plane You want to attack in a sweeping kind of motion rather than a strafing one - a motion which exposes the target to at least 2 of your 45-degree aspects.
While fighters must listen for the stall horn, the Dragon driver listens to his gunners. When they stop firing, and there’s an enema in range, that means he’s turning too hard. At which point he has a decision to make - either ease off and let them fire, or crank in more and set up for a better shot. The latter choice is tough to make since you’re probably getting pinged. But a hard turn or sharp pitch-back will bring the enemy in closer and temporarily ruin his firing solution. When you let off, your gunners can really get their shots in. If it’s a heavy plane like a FW, he’ll be struggling to stay saddled up at very low speeds while you’re just cruising around on those 4 big radials - blasting away.
The Dragon pilot must also be able to cope with damage better than anyone else. It is possible to fight on with only 1 engine or with most of your tail section shot off. The art is in adding the damage effects to your timing calculations for turns. Your typical Ack-Star driver loses control - or his willingness to engage - quickly once a few vital bits are blown off the plane. The AB-17 driver knows that his smoke draws enemy fighters, giving his friendly fighters shots at these attackers. So staying up as long as possible - even when shot to hell and with almost all gunners dead - can help the team.
To do all this effectively not only requires great skill at handling a large plane - it also requires good situational awareness. Because while you’re trying to get your gunners into position for one (or more) enemies, some other enemies are also trying to kill you. The Dragon always wants to fight outnumbered, afterall. The key to better situational awareness here is the outside view. The pilot should be flipping from inside to out almost constantly, trying to keep as clear a picture in his mind as possible about what’s happing all around his plane. So now the pilot must also project his moves 10 seconds in advance while seldom looking at the world from the cockpit view.
There are two ways using the outside view can also really help your team. The Dragon’s 360-degree view allows it to spot enemies much easier than most fighters can. Having a 17’ around gives the fighters the equivalent of several extra sets of eyes. And, since most enemies trying to run away are trying to do so at low altitude, the outside view gives a much better look at the deck than fighters can get in level flight. So the Dragon can do “clean up” for the fighter guys - running down and finishing off their kills for them. And there are few things as scrary as trying to ditch with an angry B-17 closing fast on you with all guns blazing.
The last bit of the envelope that requires mentioning is the ground. The AB-17 has big wings - and when attacking an enemy field right on the deck, it is very easy to snag one of these on the ground. Players new to the Dragon who are used to fighters usually clip a few wings early on because they’re used to the distance they had from the cockpit to the ground from fighters. A good B-17 driver can manouever right on the deck with the fighters and not get tangled up in buildings or dirt.
Stoopid B-17 Tricks
Actually, these tricks aren’t so much stoopid as evile. They are designed to inflict as much damage as possible, and help your countrymen as much as possible. This is one of the big differences between the Blood Dragon and an Ack-Star. An Ack-Star will just tool around more or less in one place - it doesn’t hunt, and it doesn’t really work with the tea. A Blood Dragon thinks its a fighter most of the time, and behaves as such. This also means it understands how to help friendlies out of trouble, how to intercept, and how to work the vertical.
The “Death-Blossom” Immelman
The classic AB-17 move, the Death Blossom requires good timing and good control at both ends of the envelope. The manouever is started at about range 30 - once you spot a large pack of enemies engaged in a fight. The next step is to dive at about 30 degrees until the enemy swarm is in your forward-up view. About this time the plane should be transitioning from a heavy buffet to compressability - meaning it’s going to start trying to climb into the swarm. So, let it - in fact, you want to yank back until you’re almost in a vertical climb into the midst os the enemies. Now just hold the climb - and listen to the music of Otto. The ‘17 will hang on its props pretty well, so just milk it for every second until it falls off on a wing. Kicking in a little aileron also gives a nice spin effect to the gunnery pattern. Then gather the plane up and come around for another pass. You’ll need to be pretty good at handling the ‘17 from a stall in order to recover here.
The effect of this move is to place all those machine guns on what is effectively a near-stationary firing platform in the middle of the enemy swarm for as much as 20 seconds. The devestation this can cause is quite joyous.
There are two other occasions where this move can come in handy. One is when attacking (“vultching”) an enemy field. You come in right over the field at top speed, and then pitch back and hong on your props over the field. Again, you’re going for maximum exposure of your guns. You may even want to hang at an angle to give an extra waist gunner Otto a shot.
The other occasion is when you have a fighter coming after you and you spot him when he’s still at a long 6 position. Once again, timing and control are key. Start a shallow dive to pick up as much speed as possible. As soon as the enemy fighter is at about D15, crank back hard until you’re almost vertical and then let off the stick - no G’s. You’ll be moving very slowly up and away from the oncoming fighter - who by now is going damn fast trying to catch you. So fast that he’ll have a tough time getting a shot in given the way your ship is moving. But your Otto’s can rake him coming and going. And if he’s foolish enough to crank around right there and fight it out, he’s probably dead before he can get another shot off (unless he’s a heavy bird - like a FW or Corsair or P38).
“Stitching A Runway”
Contrary to popular opinion, AB-17 pilots will always take bombs on offensive missions. While the usual choice is the big 2000 pounders, the big bunch of 100 pounders also has an interesting use. That is to “stitch” an enemy field from end to end. This is done by setting the salvo to 24 and the delay to around 75 (for a small field). If the bombs are triggered as the sight crosses one end of the runway, a nice line of bombs can be run up the length of the field. With a little rudder input, this line can sway back and forth across the runway. Sometimes you’ll get lucky and one of the bombs will hit someone trying to takeoff or land.
But the real value is to disrupt enemy air traffic trying to use that field. They now have to be extremely careful when landing or especially taking off, else they drop a landing gear into a bomb crater. If done just before a strike group is going to try to take the field, this can obviously be a big help as the enemy won’t be able to get reinforcements and replacements in the air as efficiently as they could on an intact field.
“Roving Low Cover”
An effective bomber escort tactic used in WW2 was “roving high cover” - sending fighters out ahead of the bombers to deal with interceptors while they assembled. The same kind of thing can be done in WarBirds with the AB-17. When your country’s fighters are getting ready to head toward an enemy field or inbound enemy group, take up an AB-17 and head in the same direction at maximum speed (or as fast as the beast can manage). You probably want to ditch bombs as soon as you see enemy planes - sometimes the enemy won’t bother you (wanting to gang-bang your fighters instead) - so you may get a free shot at their feidl and make them pay for their greed.
But what you want is for them to come in after you before your friendly fighters get on the scene. But, with the exception of Zekes and Oscars, the B-17 isn’t likely to catch a fighter. So how do you get the fighters to play your game? One way is to attack their Ju-52’s if they’re going for a field capture. Another is to simply bounce the fighters. The B-17 can handle a lot more speed from a dive than one would think - and it can honk around in a turn pretty well too. The trick is getting the element of surprise. Which, as it turns out, isn’t all that hard to do.
Fighters generally won’t go after a bomber - especially a B-17 - unless it’s a threat, or there’s nothing better to shoot. Well, in this mission profile, there’s your friendly fighters for them to shoot, and you’re intercepting far away from their base - so you’re no threat as a bomber. So if you fly like a bomber - kind of slow, trying to keep out of sight - sort of - chances are they’ll assume someone at whatever base you’re heading to will pick you up.
Just about when the enemy fighters you’re going to attack are at your 2 or 10 o’clock (depending on which side you’re taking them from), you should start an oblique, climbing turn-in to attack. Timed right, you’ll be coming in on their rear quarter in a dive. Don’t worry about buffetting. Pour it on and attack the biggest swarm of enemy fighters in your path. Make sure you don’t pull G’s while in their midst or your Otto’s will stop firing. After your first pass, you should still have enough speed to climb and loop back. Done juuuuuussst right, you’ll be coming over the top with the enemy fighters right below you.
Note that this tactic works just as well for B25H’s or other attack bombers. The end result of such an attack is that the enemy fighters are now slow from flat-turning to deal with your bounce, and probably a little shot up. By the time your “Little Friends” arrive, they have a nice feast layed out for them. Courtesy of the Dragon.
Finale
Is using the B-17 as field suppression weapon realistic? Hell no.
Is using the B-17 as a fighter escort realistic? Nuh uh.
Is it fun (except for the victims)? Hell yeah.
Are people going to stop “ack-staring” any time soon? Not likely.
A lot of players really hate seeing the B-17 used this way. Of course, for the true AB-17 driver, that is the desired reaction. It is a terror weapon, afterall. Meant to be used alone, or to combat the effects of “Horde Warrior” (the lame tactic of not attacking anything you don’t outnumber at least 5:2). The difference between an Ack-Star driver and the Blood Dragon driver is seen in how he gets his kills. An Ack-Star goes round and round, and not much else. A Blood Dragon can do almost anything a fighter can do.
So next time you see a B-17 coming in at you low and all alone, see if it lead-turns you on the cross. If it does .. be afraid, be very afraid.